Introduction
Knowing how to disassemble a keyboard is a valuable skill for anyone looking to maintain, repair, or customize their device. Whether you’re cleaning out dust and debris to improve performance or replacing a faulty component, this skill can save time and money. In this guide, we’ll take you through every step of the disassembly process to ensure you can competently and confidently handle your keyboard. Once you’re familiar with the basics, disassembling a keyboard can become a straightforward, almost routine task.
Tools and Workspace Preparation
Before diving into disassembling your keyboard, preparation is key. Assembling the right tools and setting up a suitable workspace will make the process smoother. Here’s what you need to get started:
- Screwdriver Set: You’ll find these indispensable for removing various screws.
- Keycap Puller: This tool helps safely lift keycaps off the keyboard.
- Soft Cloth or Towel: Use this to protect your keyboard and work surface from scratches.
- Small Containers: Organize screws and smaller parts to prevent loss.
- Antistatic Wrist Strap (optional): Useful for preventing static electricity damage to components.
With your tools ready, set up a clean, well-lit workspace, free from clutter. This will help you keep track of all the parts throughout the disassembly process.
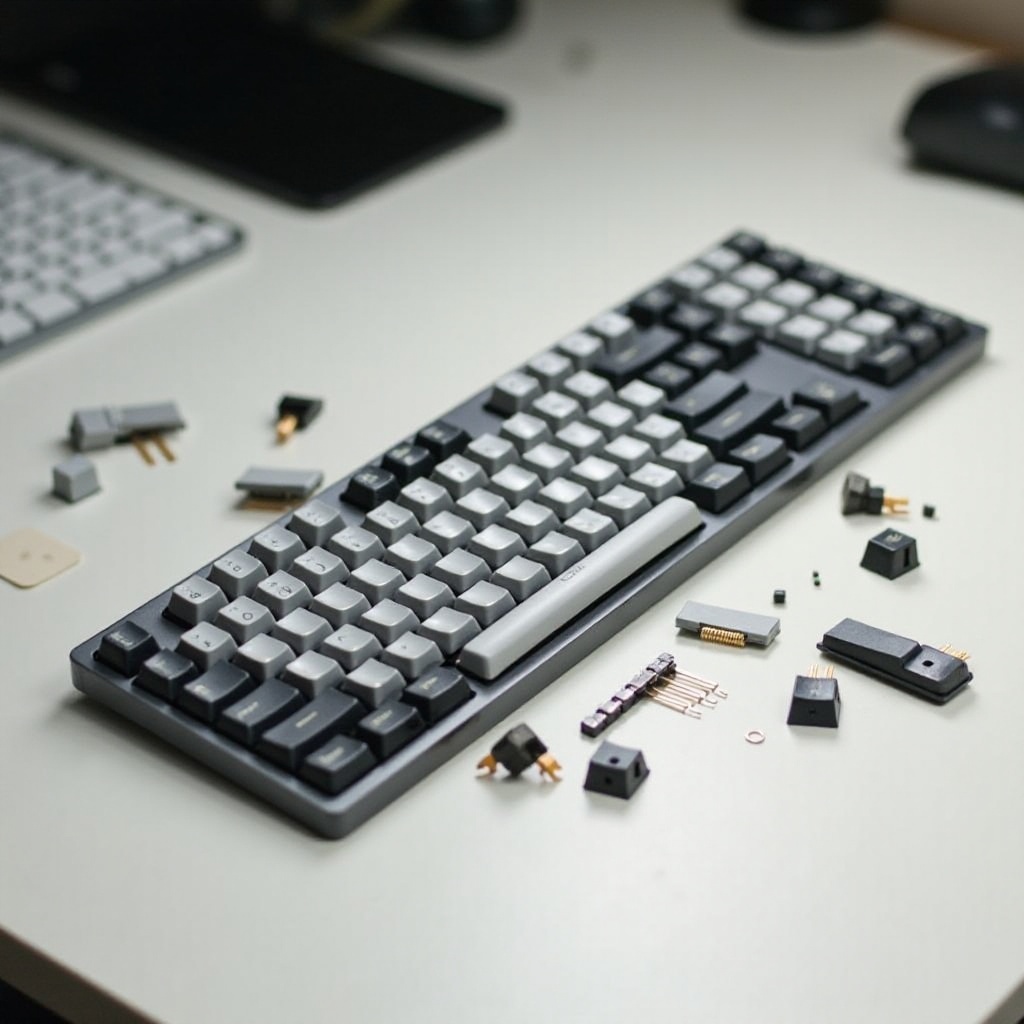
Step-by-Step Disassembly Process
Disassembling a keyboard involves several important steps, each requiring attention to detail. Let’s break it down:
-
Removing Keycaps:
Start by using the keycap puller to gently detach each keycap. Grip each keycap firmly, pull upwards, and set them aside. Maintain the placement order for easy reassembly. -
Opening the Keyboard Case:
Identify and remove the screws on the back of your keyboard with the screwdriver. Store them safely. Carefully pry open the case, keeping an eye out for any clips that may require gentle handling. -
Accessing Internal Components:
With the casing open, you’ll see components such as the circuit board and key switches. Handle these parts delicately. If cables are present, gently detach them to avoid damage. Now, any maintenance, cleaning, or replacements can be conducted safely.
By carefully following these steps, you can ensure that each component is ready for any necessary attention.

Reassembly Tips
After completing your repairs or cleaning, reassembling your keyboard is the final step. Ensure everything goes back correctly with these tips:
-
Start with Internal Components:
Reattach any cables or wires you detached earlier. Double-check to make sure all connections are secure. -
Close the Keyboard Case:
Align the case halves, ensuring all clips and fasteners are engaged properly. Replace the screws, ensuring not to overtighten them. -
Replace Keycaps:
Press each keycap down firmly over their respective switches, verifying all are in their correct locations.
Once everything is securely in place, test the keyboard to ensure each key functions correctly and that the casing is completely sealed. This ensures your keyboard is back in optimal working condition.

Conclusion
Successfully disassembling a keyboard enhances your ability to maintain and repair your device efficiently. With practice and proper care, you can enhance your keyboard’s longevity and performance. Remember, regular maintenance can prevent larger issues down the line and keep your keyboard in excellent working condition.
Frequently Asked Questions
Can disassembling a keyboard void the warranty?
Yes, disassembling a keyboard can void its warranty. Always check the manufacturer’s guidelines before proceeding.
What should I do if I lose a small component?
If a component is lost, try obtaining a replacement from the manufacturer or a specialized electronics store.
How often should I disassemble and clean my keyboard?
It’s recommended to disassemble and clean your keyboard every six months or more frequently if spills occur or debris collection is noticeable.